Wednesday, June 22, 2011

Butterfly Pavilion

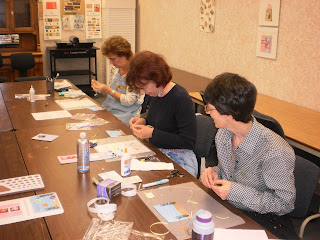
My ladies group went to the Butterfly Pavilion in Denver.  I had no idea they had spiders and undersea creatures in addition to butterflies.  When I saw the letter stickers with butterflies on them, I knew they would be perfect for this layout. I stuck them onto ribbon to make them stand out more.  My hubby bought me the large butterfly punch as a gift when he had to cancel our picnic.  The top butterflies are layered over a cut out solid butterfly.


This page focuses on the spiders.  I didn’t want it to look like a Halloween page so I stayed away from those colors.   The webs are hand drawn and the spiders are stamped.  The central spider is backed with velvet (AKA flocked) paper to bring out his fuzziness.  I thought only dangerous spiders were fuzzy – did you?  I don’t remember where I got the die cut spider, but there are dies available to make your own.  The subtitle is on confetti vellum. 


The vellum for the starfish has shells on it and for the butterflies it has flowers.  The top of the shell vellum was cut with “wave” scissors.  If I could redo it, I would move the “starfish” subtitle to below the photos so it doesn’t interfere with the main title.   The little butterflies are punched from cardstock with a vellum overlay.  The corners of the floral vellum are punched with a scallop design on top and have little butterflies punched out on the bottom.  If I would have punched butterflies out of the top, they would have been upside down.


Supplies
Background paper - Wordsworth
Dies – Martha Stewart Large Butterfly, EK Success small butterfly, Creative Memories scallop corner punch
Scissors – Fiskars Wave
Letter Stickers – K&Company SW Botanical
Rub-on Letters – Wordsworth Broken Blues
Spider stamps – Hot Fudge Studio (what a great name!)
Vellum – confetti from JoAnn, shell & floral I bought too long ago to remember

Tuesday, June 21, 2011

90th Birthday

For the front I die cut round and long balloons and punched smaller oval balloons.  I glued each color family onto a base, using foam tape for the last two layers.


I added matching bakers twine to each set and adhered them to the front of the card.  I wanted 90 balloons, but there wasn’t enough room.  The ladies name and age were added to the front with stickers.


What a great opportunity to use my pop-up cake die!  I made it with pink dotted cardstock decorated with ribbon and fuzzy trim.


It came out more oval than round and the tops don’t open flat, but I think it is pretty good for my first one.  One of the ladies said it looked like a cruise ship, which it does – maybe another use for this die!  In order to keep the card closed I glued a little Velcro on each side.


Supplies
Paper – Bazzill Walnut Cream, Die Cuts with a View Cram & White, BoBunny Flamingo Double Dot, scraps of many colors and patterns
Dies – Sizzix Cake, Three Tier 3-D (pop-up), Accucut round and long balloons
Punch – Martha Stewart oval balloon
Stamps – Hero Arts Happy Birthday, Penny Black Live Life
Ink – Tsukineko Serenade Pink Shades
Embossing Powder – Ranger Embossing Tinsel Bridal
Bakers Twine – Divine Twine
Letter Stickers – Creative Imaginations Strawberry Sorbet Alphabet

Monday, June 20, 2011

“Sew” Fabulous Cards


I am teaching a class to make these three cards (and two others) on July 2.  For once, I was a little ahead of a trend and developed this before The World of the  Seamstress article came out in Paper Crafts May/June 2011 Issue.  To keep them looking like a set I used only one paper collection (Cosmo Cricket’s Material Girl), one set of colors (green, pink, yellow and orange), and cut all the paper with pinking shears.  The other two cards (stay tuned for a future post) will use the Sew Easy system from We R Memory Keepers to add some stitching.


This is my favorite card.  It uses some vintage trim I found at an antique store, a vintage pattern lady from a Hero Arts stamp set and, a pin from Little Yellow Bicycles Clothesline collection.  Although dangerous to mail, the floral pin adds some color and dimension to the sentiment.  This is the first time I have ever used a pin on a card and I am hooked.


I found these little wooden spools at an antique store in Trinidad, CO and bought all they had.  I wound floss on them and strung them on a line with buttons for a clothesline type of look.  The sentiments are stamped on paper squares reminiscent of quilt blocks.  After seeing a tutorial Betsy Veldman did on grid style cards, I may redo it in that style.

No individual photo of the third card – sorry.  I used a Quick Kutz scalloped circle die to cut a pattern, and then folded them to make a full flower.  Tip – wait for a sale and buy a doll clothes pattern.  It has more printing closer together so you don’t end up with a lot of blank pattern paper.  I hand drew the flourishes and glued some pink trim I adored on the lines (let the glue dry a little first so they adhere better).  It is finished off with a threaded pink button.  If you wanted to make it look more vintage, you could rub some brown ink on the cut pattern pieces, especially the edges.

Vacation Bible School Prep

Since the main duty was cutting stacks and stacks of things out, scissors had to play a part in the layout.  I found a die, but $7.50 was too much to pay.  I also found some really cute sewing themed paper that had scissors I could cut out, but the paper was too nice to cut up.  I ended up with a stamp - $1.25 was a great price, it came with a glue bottle and a flask stamp, and I can use it for lots of other projects.


The background paper I chose has crosses on it.  They are subtle, but go along with the Vacation Bible School theme.  The photos were cut into an oval to focus on the people and work, and to go along with the round tables.  I wanted the titles to look like they were being cut out so I made slits and glued the scissors so it looked like they were cutting the titles.  The scissors were made by embossing the blades in sliver on black cardstock and the handles in clear on orange cardstock and gluing them together.  Instead of cutting out the handle centers, I punched a hole – much faster & easier.  Didn’t they come out great?  The title frame and date decoration were made using a stencil and a marker.


Supplies
Paper – True Faith Purple Cross Collage; scraps of white, black & orange
Scissor stamp – We R Memory Keepers Science Fair
Letter & number stickers – Déjà Views Dot
Embossing powder – Zing clear, Rubber Stampede silver
Stencil – Fairy Tale Scrapbook Creations Heritage Borders
Creative Memories cutting system

Sunday, June 19, 2011

Sushi & Bowling

Try combining those on one layout!


I started with red & white paper because it balanced the blue & yellow in the photos, and it went with the black, red & white colors of the bowling stickers.  Sushi came first.  To set it apart I used some red and gold oriental style paper and brush stroke style letter stickers which I colored in with a black marker.  I used an Asian coin and a chopstick stamp to finish it off.


I cut apart a piece of bowling themed paper for some pins and balls.  Some of the ball edges had to be colored in with a black colored pencil and a black marker.  The two pins on the sides had to be pieced.  The small pins I drew and cut out myself.  The tall thin photos were mounted on bowling pins.  The two rounder photos were mounted on the bowling balls.  All the corners were rounded to go along with the rounded pins and balls.  Lastly the pages were decorated with the bowling themed stickers.

I think it actually worked J


Supplies
Paper - Memories Complete Cranberry Pinstripe, Unknown red and gold paper, Moxxie Strike!
Stickers – Wordsworth letters, Colorbök slim numbers, SRM Border Sets Bowling, Reminisce Bowling
Chopstick stamp – Jim Stephan
Asian Coin – Powder Sensations

Saturday, June 18, 2011

Our First Tomatoes


Everything is planted outside now and has been fertilized.  The veggies are really starting to take off.  We ate our first garden produce this week.  Little yellow pear tomatoes – yum!


Broccoli

Lettuce

Onions & Potatoes


Corn

Even the sunflowers (and possibly squash) are growing tall


Use it or Lose it

I mentioned I was getting rid of some craft supplies and a friend said, “Why did you buy it in the first place?”  I started thinking of things I bought because I just had to have them and then never used.  My goal now is to use every stamp, accessory and supply I have, decide if I really like it, then keep or get rid of it.  I am hoping to have enough to sell at the October Trash and Treasure Sale at Simple Pleasures (http://www.simplepleasuresstamps.com/).  I will keep you posted.

Tuesday, June 7, 2011

Garden - Planting Outside Part 2

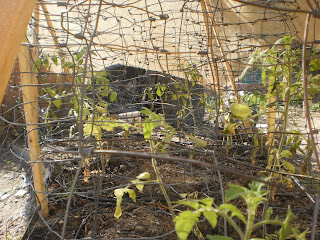
Hubby spent several hours making tomato cages and transplanting our tomato plants outside.  It was so windy he and the tomatoes just about blew away.


Once all the tomatoes were planted hubby tented them to protect them from full sun until they 'settled in'.


 Next he planted our two big bell peppers, our two green beans and the corn.


Monday, June 6, 2011

Garden - Planting Outside Part 3

Today I planted sunflowers, 5 colors of bell peppers (can you name all five?) and Anaheim chili peppers.  I was so covered with dirt that I almost took my clothes off outside, but I decided I did not want to freak anyone out on the walking trail behind our house.


The sunflowers were planted in a pot that had squash seeds that did not sprout, so we may have squash mixed with our sunflowers.  The bottles are to keep the soil warmer.

The bell peppers and Anaheim peppers we started from seed are so much tinier than the ones we bought.  I hope they grow up.

Garden - Planting Outside!

Finally, we get to plant outside!!

First the lettuce and broccoli spent the night outside.  Hubby covered them up so they wouldn't catch cold.


Getting ready to plant is like preparting for surgury.  Plants?  Check.   Soil prepped?  Check.   Tools ready?  Check.   Watering can?  Check.

The lettuce looking a little wilted, but I think it was happy to be in the ground.

The broccoli are so tiny to be out on their own.

Sally (my white poodle) supervised all the planting.  I think she wanted to make sure I didn't disappear into a hole in the ground like Alice.

Note - there were suppossed to be a lot more photos but I could not get them to load, sorry :(

Thursday, June 2, 2011

First Anniversary

One who year of marriage!  Since paper is the traditional 1st year gift and clocks are the modern gift, hubby got a paper clock.

Wednesday, June 1, 2011

Quilling Class

I taught my very first quilling class on Saturday. There were six participants and they all made wonderful cards.


We made a simple card with three flowers to start


One of the participants tilted her burgundy squares and it looked even better.  Pearls could also be used for the centers.

Next was a butterfly card using crimped quilling paper.  Unfortunately the photo of this card was blurred, so you will just have to imagine it.

Our last card was an undersea scene.

The water and sand are printed paper, the seaweed is embossed, and the shells are real.  This card was harder than it looked because it required lots of shaping without pinching.

Garden Update


The root vegetable plot is doing well.  There are so many little plants growing in the carrot plot, I don't know what is a carrot and what is a weed.

We bought three strawberry plants since the plants from last year did not come back.  I hope to have lots more next year.  Strawberries are one of my favorite things.


Indoor plant are doing well and very impatient to be planted outside.